Getting Acquainted With Your Pressure Cooker
Identifying Key Components
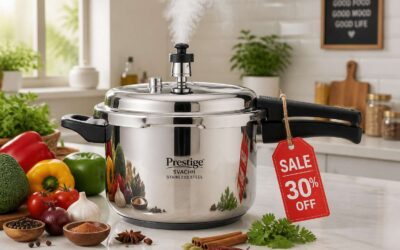
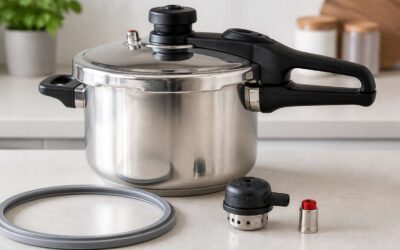
Familiarising yourself with your pressure cooker before reading any pressure cooker instructions is the difference between a reliable tool and a dangerous mystery. I remember the first time I held a new pot in Pretoria, feeling the weight of its stainless steel body. The lid is your primary interface. Inside its rim, you will find the sealing ring, often rubber, which creates the airtight environment. The vent pipe and the pressure regulator sit on top. The safety lock prevents the lid from opening under pressure.
A quick inspection routine helps:
- Check the sealing ring for cracks or stiffness
- Confirm the vent pipe is clear
- Test the float valve for smooth movement
Once you recognise these components, every subsequent step becomes clearer. Honestly, that clarity simplifies everything!
Checking the Safety Features
Loadshedding taught me to respect anything that holds pressure. Before I trust a new pot, I move my fingers across every safety feature. The overpressure plug must sit flush in its recess. The steam release valve must rotate with clean resistance, never a grinding catch.
Acquaintance builds through repeated handling:
- Rotate the steam release valve through its full range to gauge stiffness
- Press the overpressure plug inward to confirm it springs back
- Check the lid alignment marks meet cleanly
These gestures convert written pressure cooker instructions into felt knowledge. The manual explains what the parts do; your hands tell you when they are ready.
Selecting the Ideal Cooker Size
Loadshedding might have taught you to respect pressure, but it teaches nothing about portion sizes. The first acquaintance with a new pot is picking the right one, not staring at it. A 6 litre cooker handles a family of four with leftovers. Single or two person households get away with 4 or 5 litres.
Lift the empty pot in the store. Feel the weight. If the empty version strains your wrist, the loaded version will defeat you on a Tuesday night.
- 4 to 5 litres: couples, students, flat dwellers
- 6 litres: families and meal preppers
- 8 litres or more: weekend entertainers
Size also affects how quickly the pot reaches pressure. Smaller volumes heat faster, which matters when Eskom decides your dinner window. The best pressure cooker instructions cannot shrink a giant pot to fit your schedule. Choose the size that respects your stove, your storage and your appetite.
Preparing for a Successful Cooking Session
Inspecting the Valve and Sealing Ring
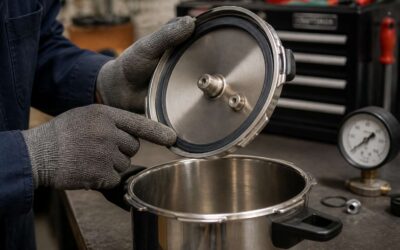
A pressure cooker is a marvel of domestic engineering, but it rewards attention. Before you even think about heat, give the valve and sealing ring a moment of your time. The valve should move freely when nudged. The sealing ring demands a close inspection for:
- Cracks or tears along its edge
- A spongy or hardened texture
- Debris trapped in the crevices
A hardened ring is a common culprit behind a hissy, failed session. Follow these pressure cooker instructions with the same diligence you would a favourite family recipe: check, clean, and replace when necessary. A quick test: stretch the ring gently; it should spring back, not sag. These small rituals separate a serene supper from a stovetop spectacle.
Adding the Correct Amount of Liquid
With the valve and sealing ring in good shape, the next phase of pressure cooker instructions centres on preparation. The liquid you add is the basis of the entire process. Too little, and you will discover how quickly food turns to charcoal. Too much, and your kitchen smells like a laundry room for an hour.
Most recipes request at least 250 millilitres, though your specific model’s manual overrules any general pressure cooker instructions found online. Water and stock work well. Wine adds flavour, but keep the minimum in mind.
- Electric cookers typically need 300 to 500 millilitres
- Stovetop cookers often need 500 to 750 millilitres
- Consult the manual for your exact model
Heat control matters as much as volume. Rapid heating causes the liquid to escape before pressure builds. Low and slow means the cooker never reaches the point of cooking. Find the middle range and hold it steady.
Arranging Ingredients in the Basket
Arranging food in the basket decides the outcome of your meal before the lid clicks shut. Dense vegetables such as butternut and beetroot belong at the base. Fish fillets and leafy greens rest above, where the distance from the heat keeps them from overcooking. This hierarchy follows the core pressure cooker instructions: respect the space between pieces.
Overcrowding prevents tender results. When ingredients press together, steam cannot circulate freely. One side of the pot cooks while the other stays firm. Leave a finger’s width between chunks.
For mixed batches, I work in this order:
- Hard root vegetables, sliced evenly, at the bottom.
- Proteins such as chicken thighs or fish in the middle.
- Quick cooking greens or dumplings on top.
The basket holds more than you expect, but cooks best with less. Each piece must meet the steam directly.
Locking the Lid Securely
Before anything else, prepare your workspace. A clear counter, a steady base, and a towel for the inevitable condensation keep the session focused. I check that the pot sits level and the handle moves freely. Without this simple groundwork, even the best pressure cooker instructions lose their value.
Locking the lid securely requires attention rather than force. Align the arrows on the lid and body. Push down gently until the mechanism clicks. If it resists, do not push harder. The lid should settle with a quiet, definite snap.
Once locked, give the lid a gentle wobble. It should not shift! This small check takes seconds and prevents problems later. This routine is simple, but it guards every meal that follows.
Selecting the Right Pressure Setting
Preparation dictates the rhythm of the whole cook. I have every ingredient prepped before the pot heats, since the sealed environment leaves no room for mid-cooking additions. A short checklist keeps me grounded:
- Vegetables trimmed and portioned
- Spices measured into a small bowl
- Liquid measured and ready near the valve
This forethought means once the lid clicks, the process flows without interruption. Following these pressure cooker instructions prevents frantic searching for a forgotten stock cube.
Selecting the right pressure setting requires attention. High pressure suits tougher cuts and dense beans. Low pressure preserves delicate fish and quick-cooking greens. Your manual lists baseline times, but judgment comes from knowing your stove. When in doubt, choose the gentler route; you can always cook longer, but you cannot undo a mushy meal.
Mastering the Cooking Process Step by Step
Heating Up and Building Pressure
Heating up is where the real choreography begins, and it tests your patience more than any other stage. After you have locked the lid and selected your setting, you must wait for the internal temperature to climb. During this phase, the pressure cooker instructions transition from preparation to live monitoring, and the appliance will emit a soft hiss as steam starts to form inside the sealed chamber. You might notice the indicator pin rising slowly, a visual confirmation that the vessel is doing its job.
Observe the sequence of events closely to ensure nothing is amiss:
1. Steam escapes in short puffs from the vent.
2. The safety locking mechanism clicks into full position.
3. The pressure indicator rises to its designated line.
4. The hissing sound settles into a steady rhythm.
Once the pin reaches its mark, the pressure has been fully achieved. That steady sound is your signal to reduce the heat source and begin counting the actual cooking time. Do not rush this stage; a premature heat reduction prevents the pressure from stabilising, which alters the texture of your food for the worse.
Setting the Timer for Optimal Results
Setting the timer is where the real control begins. Once the pressure pin locks into place, you are no longer reacting to the appliance. You are directing it! The clock becomes your primary tool, and a few seconds of distraction can shift the entire outcome.
For most recipes, the timer starts only after pressure is fully achieved, not when you turn the knob. This distinction is central to any reliable pressure cooker instructions. The exact moment the hiss steadies is the reference point for counting down. A digital timer with a loud chime helps, since ambient kitchen noise often masks softer sounds.
The sequence of timing work unfolds in a clear order:
- Visual confirmation of the pressure level.
- Verification of the recipe’s required duration.
- Setting the timer for that exact figure.
- Allowing the residual pressure to finish cooking after the heat source is off.
The internal temperature continues to perform its work during this phase, which many newcomers overlook.
Adjusting Pressure Levels for Different Foods
Cooking under pressure is a negotiation. Different foods surrender structure at different rates, so adjusting pressure levels for different foods becomes a core skill. High pressure suits proteins like oxtail, where collagen needs time to melt. Low pressure protects items like hake fillets or asparagus tips. In South African homes, this distinction matters when a pot serves a rich stew and light vegetables.
Following pressure cooker instructions, the sequence of adjustments follows a logical path. You assess size, density, and water content. Then you choose the corresponding pressure level. Pressure cooker instructions list ranges, but the final decision rests on your observation.
- High pressure: tough cuts, dried beans, whole grains.
- Low pressure: seafood, leafy greens, soft fruit.
Each choice alters cooking time and final mouthfeel. A quick release halts the process, while natural release lets residual heat finish the job. Mastering this balance transforms a dinner into something intentional.
Using the Sauté and Keep-Warm Functions
The sauté function transforms the pot into an open skillet before pressure ever builds. Searing oxtail or sweating onions in the base creates flavour compounds that steaming alone cannot produce. In Durban kitchens, this step often decides whether a curry tastes layered or merely boiled.
Follow pressure cooker instructions when switching between modes. Sauté demands an open lid and constant stirring, as sugars can scorch quickly. After browning, deglaze with stock or wine to lift the browned bits from the base. Keep-warm activates after natural release, holding the finished dish at serving temperature without further cooking.
A typical sequence:
– Sauté aromatics until fragrant.
– Brown meat in batches.
– Deglaze the pot completely.
– Lock the lid and build pressure.
Keep-warm preserves the texture of sides like samp or rice, holding them until the table is ready.
Performing a Natural Pressure Release
There is a quiet satisfaction in watching the pressure gauge sink at its own pace. Natural pressure release is the final act of cooking, not a hurried afterthought. When I first studied pressure cooker instructions, I rushed this stage and paid for it with tough meat. The process demands stillness. Turn off the heat and leave the pot alone. Residual warmth continues to cook the food while pressure eases to zero. This takes ten to twenty minutes, depending on the contents.
- Switch off the heat source completely.
- Leave the valve untouched.
- Wait until the pin drops on its own.
For stews and beans, this gradual release is essential. The gentle temperature drop lets fibres relax rather than contract. In South African kitchens, oxtail and sugar beans improve markedly. Forcing the valve open invites predictable steam burns. Patience is the quiet genius of achieving a proper natural release.
Performing a Quick Pressure Release
Some foods cannot soak in residual heat. Green beans, fish fillets, and baby marrows need to stop cooking the second the timer beeps. That is where quick pressure release matters in any pressure cooker instructions.
Stand to the side and use a wooden spoon to nudge the valve to venting. Steam rushes out in a vigorous plume, so keep hands clear. The release ends when the lid unlocks. Liquid can splutter if the pot is overfilled, so I keep a cloth over the valve.
What suits a quick release?
– Quick-cooking vegetables
– Delicate fish such as snoek or linefish
– Foods undercooked for a stir-fry
This takes two to three minutes, unlike natural release. Both have their place in a South African kitchen. Tender asparagus or kingklip requires the quick route. Saag aloo or umphokoqo benefits from the slow one. Reading the recipe is the first step to mastering pressure cooker instructions.
Achieving Perfect Results Every Time
Estimating Cooking Times for Common Ingredients
Few kitchen tasks hinge on timing as much as pressure cooking. Estimating cooking times for common ingredients transforms a simple device into a reliable tool. In South African homes, staple items like pap and samp behave differently under pressure, so precise estimates matter.
- Lamb stew meat: 20 minutes
- Sweet potatoes: 12 minutes
- Cabbage wedges: 4 minutes
These figures serve as starting points. Your specific model and altitude shift the numbers. I consult the pressure cooker instructions once, then record my own adjustments in a notebook. This habit builds confidence. For example, frozen vegetables need half the time of fresh ones, and larger cuts demand double the minutes. Uniform piece sizes reduce guesswork, and slightly undercooking is safer than overcooking.
Adapting Conventional Recipes for Pressure Cooking
Perfection in pressure cooking is a negotiation with physics. I have burned enough batches to respect the machine’s moods. One secret is to treat conventional recipes as loose inspiration. Reduce liquids by a third, since the sealed pot hoards steam. Adjust spices upward, because pressure dulls aromatic oils. The reliable path involves testing, then tweaking. My pressure cooker instructions get consulted, then ignored, then consulted again. That cycle produces results.
I keep a notebook beside the cooker. Every adaptation gets recorded, from braising liquid volumes to chilli heat levels. A 30 minute stew recipe becomes 20 minutes at high pressure. A fussy risotto turns into a set-and-forget side dish. The patterns emerge quickly. Once you decode your own cooker, ordinary recipes bend to its will.
Avoiding Overcooking and Undercooking
Overcooking and undercooking share a common root: impatience with the timer. I learned this after producing mushy beans one evening and rock-hard potatoes the next. The same pressure cooker instructions yielded opposite outcomes because I ignored the food’s own pace.
Each ingredient carries its own density. Carrots need different treatment than butternut. When I stopped applying a single number to everything, the results stabilised. My pressure cooker instructions now include timing ranges instead of fixed numbers. That flexibility accounts for variations between batches.
Check your cooker’s temperature consistency. Some units cycle hot and cool. Those cycles affect dense vegetables more than liquids. Steel-cut oats tolerate variation. Cubed sweet potato does not.
- Dense vegetables outlast quick-cooking grains under pressure.
- Cold ingredients extend the climb to full pressure.
- Undercooked food can be reprocessed; overcooked food cannot.
Consistency arrives through observation, not guesswork.
Cleaning and Maintaining Your Cooker
According to a warranty claims analysis, 30% of cooker failures begin with a neglected sealing ring. That number shocked me into respecting the aftermath of cooking. Your pressure cooker instructions usually stop at the last hiss of steam, but the real work starts when the lid comes off. I once skipped a proper wipe-down and paid for it with a faint, sour odour that clung to every subsequent stew. Cleaning is not punishment; it is the quiet half of the recipe.
The valve assembly deserves your attention first. Food particles lodge there like uninvited guests. Check the steam pipe with a thin brush after each session. The sealing ring absorbs flavours and fats, so give it a warm soapy rinse and let it dry completely before you close the lid. A damp ring invites mildew, which no amount of high pressure can fix.
Maintenance becomes rhythm once you stop avoiding it:
- Remove the sealing ring and wash it separately.
- Wipe the rim and interior with a soft cloth.
- Inspect the pressure indicator for stuck debris.
- Store the cooker with the lid loosely placed.
That last point matters because a sealed lid traps moisture. Moisture breeds rust on the base and distortion in the gasket. My pressure cooker instructions now include a post-cooking ritual, not because I love scrubbing, but because a clean cooker behaves predictably. Predictability is the true gift of maintenance, and it beats any shortcut I have tried.
Troubleshooting Common Pressure Cooking Challenges
Dealing With a Leaking Seal or Valve
When steam escapes from places it should not, a pressure cooker demands attention. A leaking seal often means the silicone ring has lost its shape, or a fragment of food sits between the metal and the rubber. Check the rim for residue. The valve can also harbour debris. A pin that refuses to rise is a pin that is blocked.
Consider these usual suspects:
– A worn or misshapen sealing ring
– Food particles caught on the rim
– A valve that needs a gentle rinse
If the leak persists, the seal may need replacing entirely. These moments demand patience. Proper pressure cooker instructions always remind us that a quiet lid is a working lid, and silence is the true reward.
What to Do When Food Is Not Fully Cooked
There is a peculiar disappointment in lifting the lid to find a potato still stubborn in its centre. The pressure cooker has done its part; the question is whether you did yours. When food emerges undercooked, the first suspect is haste. Did you wait for the pin to rise before starting the timer? Without those minutes, the timer lied to you.
Altitude complicates matters, too. Johannesburg cooks at nearly 1,800 metres, which means lower boiling points and slower cooking. Most pressure cooker instructions assume sea level, so adjust.
Uniform sizes matter. A stew with chunked carrots and baby potatoes will disappoint. Cut everything to match. Here is what to check:
- Did the cooker reach full pressure before the timer began?
- Did you choose the correct pressure setting for the ingredient?
- Did a natural release do the finishing work?
Understanding and Preventing the Burn Alarm
The burn alarm is the pressure cooker’s way of telling you something has gone wrong. The temperature inside has climbed too high, usually because the bottom of the pot has lost its liquid layer. Most pressure cooker instructions warn about this, but few explain why it happens.
For South African cooks, the alarm often sounds when tomato-based sauces are used without thinning. The sugars caramelise and stick. A splash of stock or water before locking the lid makes a difference!
Prevention starts with the saute function. Brown your meat, then deglaze the pot properly. Scrape up the browned bits. Left behind, they trigger the sensor.
Common culprits:
- Thick, unthinned sauces
- Starchy ingredients resting on the base
- Cold liquid poured into a hot pot
Check your valve and sealing ring if the alarm persists. Your pressure cooker instructions show the correct replacement procedure. A worn ring causes erratic pressure behaviour, and the sensor reads that as a problem.
Handling Excessive Steam or Hissing Sounds
A hissing pressure cooker inspires panic. That hiss is usually just steam escaping through an unintended gap. Excessive steam, as opposed to the gentle puff from a properly cycling valve, means pressure is leaking where it should not. Check the sealing ring for crumbs or warping. A single grain of rice can break the seal.
If the hissing comes from the sides of the lid, lower the heat and let the pot settle. Many South African cooks turn the dial to full power, which worsens the leak. Consult your pressure cooker instructions for the correct ring orientation.
- Inspect the valve seat for trapped food particles.
- Ensure the float valve moves freely before locking.
Some hissing is steam condensing on a cold countertop. Listen for the rhythm. A steady, light hiss is normal. A violent, spitting hiss is not. Your pressure cooker instructions will remind you to stay calm and wait.
When to Replace Worn-Out Parts
Most South African kitchens have a pressure cooker that outlived its manufacturer’s warranty. The sealing ring, however, is not built to last forever. If it stretches, discolours, or loses its springiness, your pressure cooker instructions become useless against steam leaks. Replace it every 12 to 18 months, depending on use. I have seen rings last years in households that cook weekly, but the rubber still hardens over time.
Watch for these signs of wear:
- A lid that resists locking, pointing to a misshapen ring or a blocked float valve.
- A cracked overpressure plug, which should be replaced immediately.
- A valve that rattles or sticks, indicating mineral buildup.
The float valve and safety plug deserve equal attention. A sticky float valve can prevent the lid from locking, a distinct safety hazard in any South African kitchen. Cracks in the silicone parts are not worth a gamble. When these components fail, no amount of adjustment restores safe operation. Your pressure cooker instructions may include a replacement schedule, but visual checks matter more. Replacing worn parts costs less than a new pot and protects your family from a preventable accident.

0 Comments